Beginner's Guide To Turning Your Creativity Into Glittering Resin Art At Home
Here’s a complete beginner’s guide to turning simple materials into dazzling art that lasts

If you want something sparkly, durable and your own to decorate your home, resin art might just be the solution. This trendy art form allows you to project your creativity on external surfaces.
Here's a quick guide on how you can unleash your inner creative beast in the most glamorous way possible:
Materials used
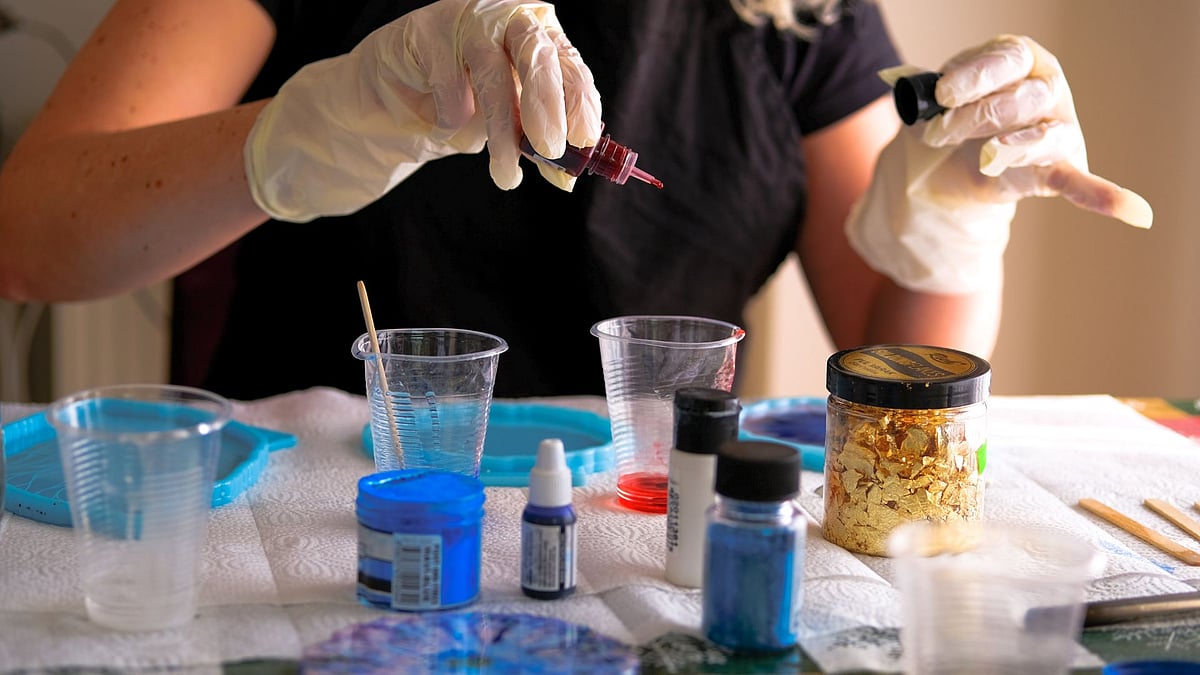
“To start resin art at home, you’ll need a resin and hardener kit, mixing cups, and wooden or silicone stir sticks,” says Anju Gupta, an avid resin artist and reseller.
Lay your hands on a primer or spray painter to ease the rough texture of wood and keep large plastic sheets or garbage bags to cover your piece once it's finished. “Safety is important, so wear gloves, a mask, an apron, and old clothes. Use silicone molds for shaping, and add color with pigments or mica powder. A heat gun or lighter helps remove bubbles, and a silicone mat protects your workspace. You can also use decorative items like glitter or dried flowers to create your own designs,” Anju adds.
The right resin
Given its varieties and importance of use, picking the right kind of resin can deeply impact the process and output of your art piece.
As Anju reveals, “Epoxy resin is beginner-friendly and gives a glossy finish, while UV resin is good for small items and cures quickly under UV light. One of the brands I used was Epoke, and I found it to be good and less harmful compared to others. It had a mild smell and was easier to handle. Using low-quality resin can be risky, as it may cause skin irritation, strong fumes, or even poor results and accidents during the process. So, it’s always better to invest in a trusted and safe brand.”
Start-off and setup
Once all your materials are in place, start by cutting and priming the surface you’ve opted for. If it’s wood then sand the edges and prime it for better colours. These steps are usually not required in the case of a canvas. You can also plan your colours ahead. Create a mental image of the way you imagine your final piece to look like it since changes will be tough to make once the materials set in. Prop your base on a height so the resin has ample space to droop off from around the edges. When it comes to preparing and mixing colours, it’s advised to keep a different disposable cup for each one. Pour resin into each colour as per the instructions and ratio given on the packet. “In epoxy resin, the most common mixing ratios are 2:1 and 3:1, depending on the brand,” Anju shares.
Creating art
Now that the setup is in place, it’s time to start the actual work. Start pouring the resin and additional pieces or smaller objects the way you had imagined them on the surface. This is the bit where your creativity plays the biggest role. Once your output looks vaguely similar to your vision, use a heat gun to remove any bubbles popping on the surface. Remember, the colours will continue to mix unless fully dry so minute changes can be expected to appear. Once finished, cover your surface with a PVC or plastic sheet without touching the surface and let it rest for at least 8 hours.
Precautions
As fun as the activity sounds, resin art can be quite hazardous to the skin and lungs if not practiced with due precautions. As Anju reveals, “Always work in a well-ventilated area with fresh air, as resin is a chemical that releases fumes and can be harmful to your health. Keep it away from children and pets at all times. Always wear a mask, a pair of gloves, and old clothes for protection, as resin is sticky and hard to remove if it spills. Be careful with the timing while using the resin mix, because it can heat up and become dangerous. Never pour leftover resin into the sink, as it can block pipes. It’s very important to follow all safety precautions when working with resin. If you feel breathless or something unusual at any point, stop the activity immediately.”
Store and display
Given the effort and energy that went into creating your art piece, it only makes sense to add equal effort into protecting your work from turning yellow or losing its glimmer over time.
In order to do so, Anju shares, “After making your artwork, it’s important to cover the pieces during the curing time. This helps protect them from dust, hair, or bugs that might fall onto the surface while the resin is still sticky. Let the pieces cure in a dry, dust-free area, and make sure the space is level and undisturbed. Once they are fully cured, store or display them away from direct sunlight.” When it comes to storing the pieces, artists are best advised to “wrap them in bubble wrap or soft cloth to avoid scratches or damage”.
Add some joy and sparkle to life by getting cracking on your next masterpiece.
RECENT STORIES
-
-
-
-
-